The good thing about this process is that it’s easy and simple. Just ensure that the Wi-Fi network is strong in the vicinity of the digital photo frame. For now, Aura gives us two options. You can either set the Aura Carver as your own or for family & friends. As noted earlier, both setup process is straightforward and is aided by the companion app—Aura Frames. Download Aura Frames from Google Play Download Aura Frames from App Store Now that’s settled, here’s how to set up the Aura Carver digital photo frame. But first,
Upgrade your patio lights to these cool smart lights this holiday season Here are the best smart plugs that you can buy Check out these simple digital picture frames for seniors
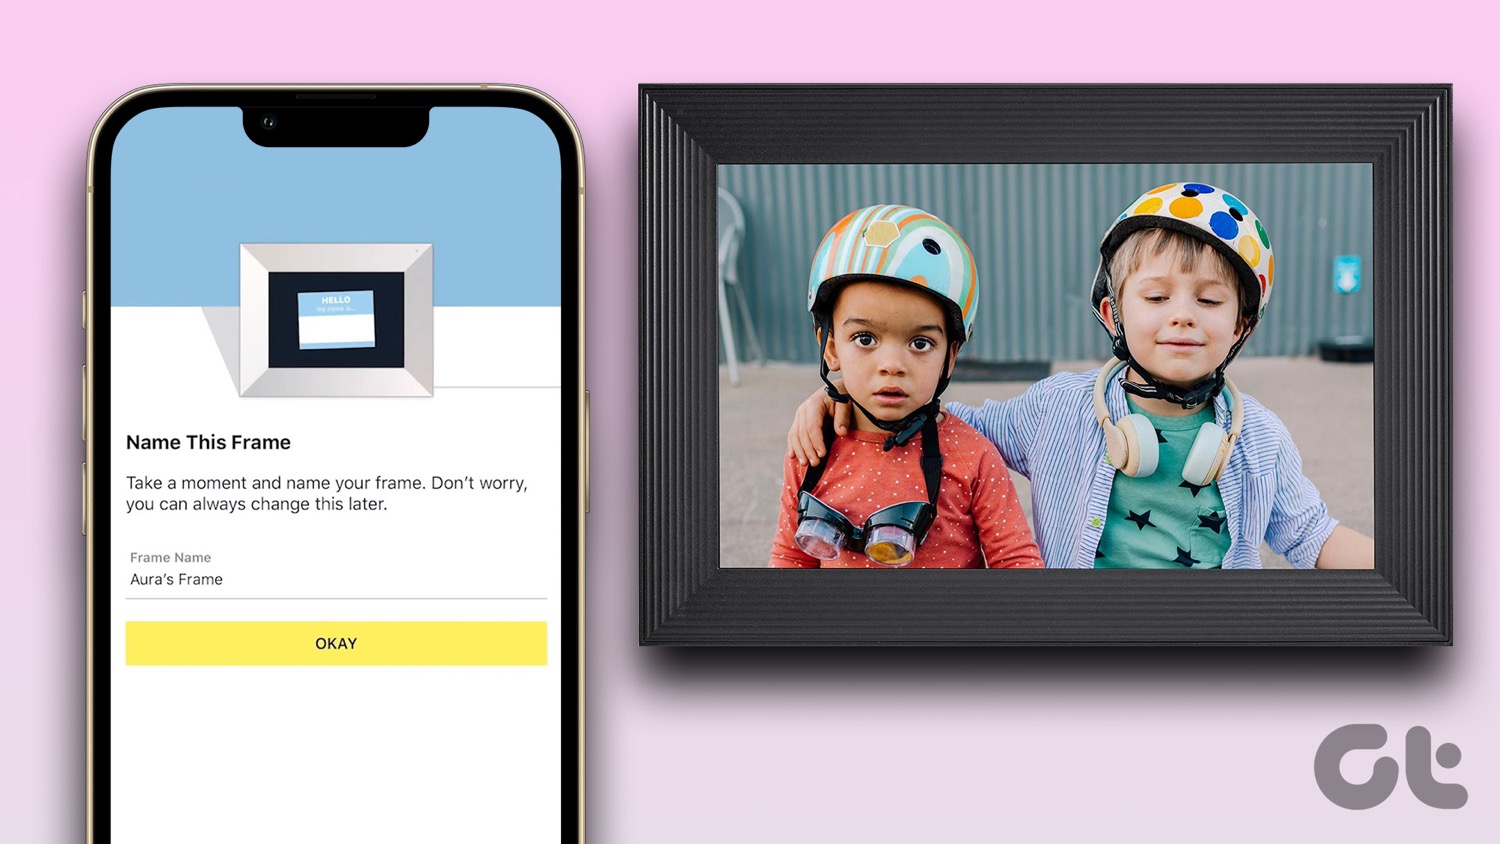
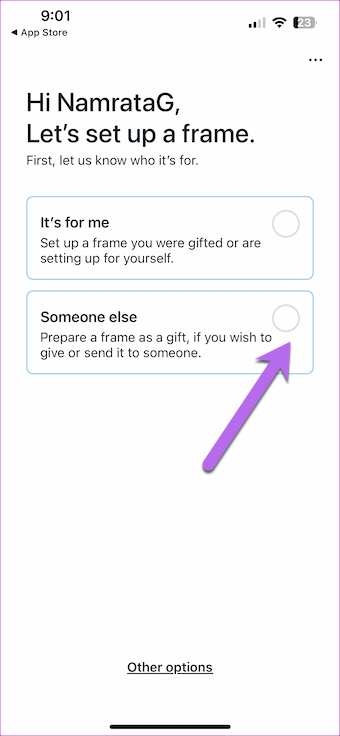
How to Set Up the Aura Carver Digital Photo Frame For You
Step 1: On the Aura Frames app, create an account using your preferred email ID. You will also need to add other details like phone number and name.
After you have verified your email ID, you can add your profile picture.
After everything is done, hit the Next button. Step 2: Select the It’s for me option, to begin the setup process.
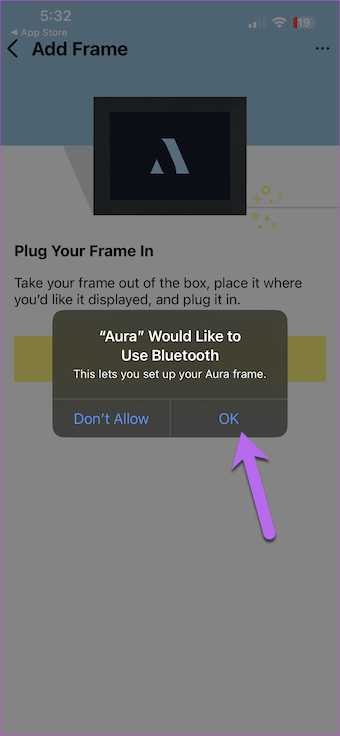
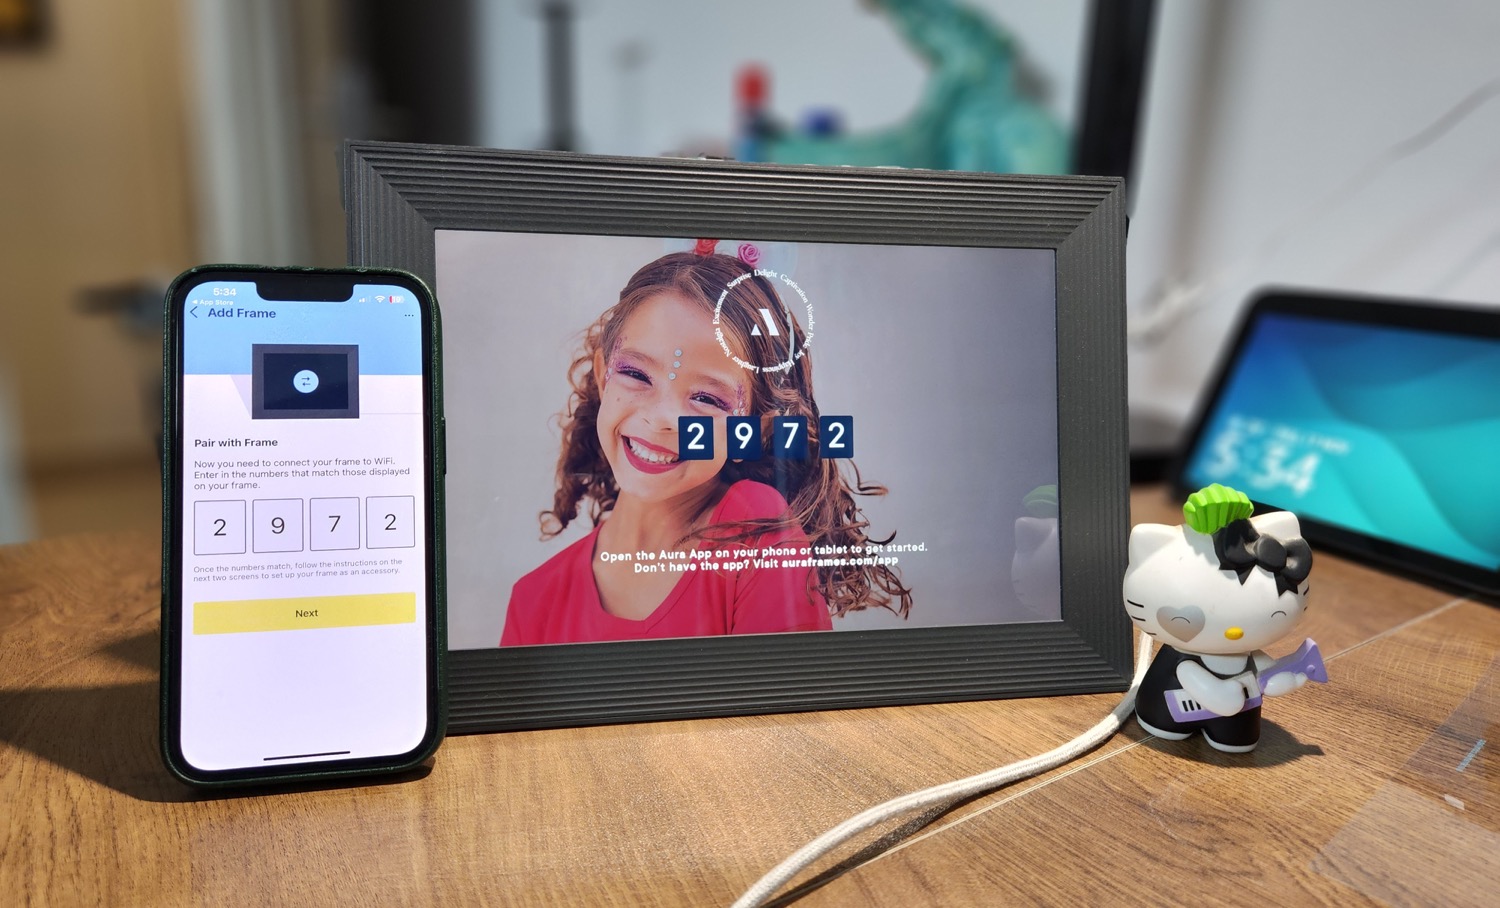
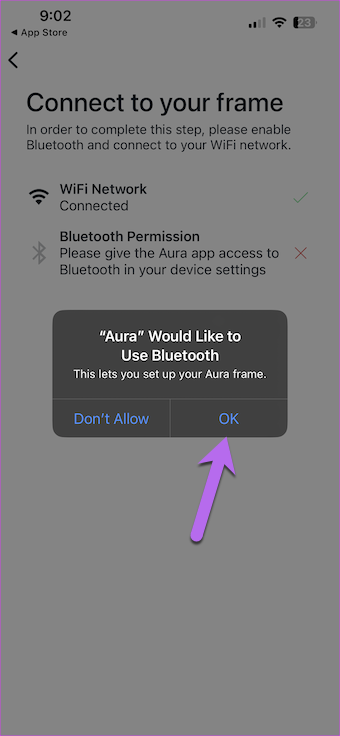
Step 3: Next, plug in the power cable to the Aura Carver, and you will see a loading screen. It will take a minute or two to load. In our case, it took around two minutes to see the welcome screen. After that, it will display a unique number for pairing purposes. In the initial stage, Bluetooth acts as the bridge between your phone and the frame until you connect it to your home Wi-Fi.
Hence, you’ll be prompted of the same. Tap on Allow to start the pairing process Step 4: Enter the unique number on your phone and hit the Next button. Step 5: Connect to your home Wi-Fi network. If you are on iPhone, you needn’t enter the Wi-Fi password.
Connecting the Aura Carver to home Wi-Fi takes some time. In our case, it took us around 4-5 minutes. After that, the frame is ready. Next, add the photos.
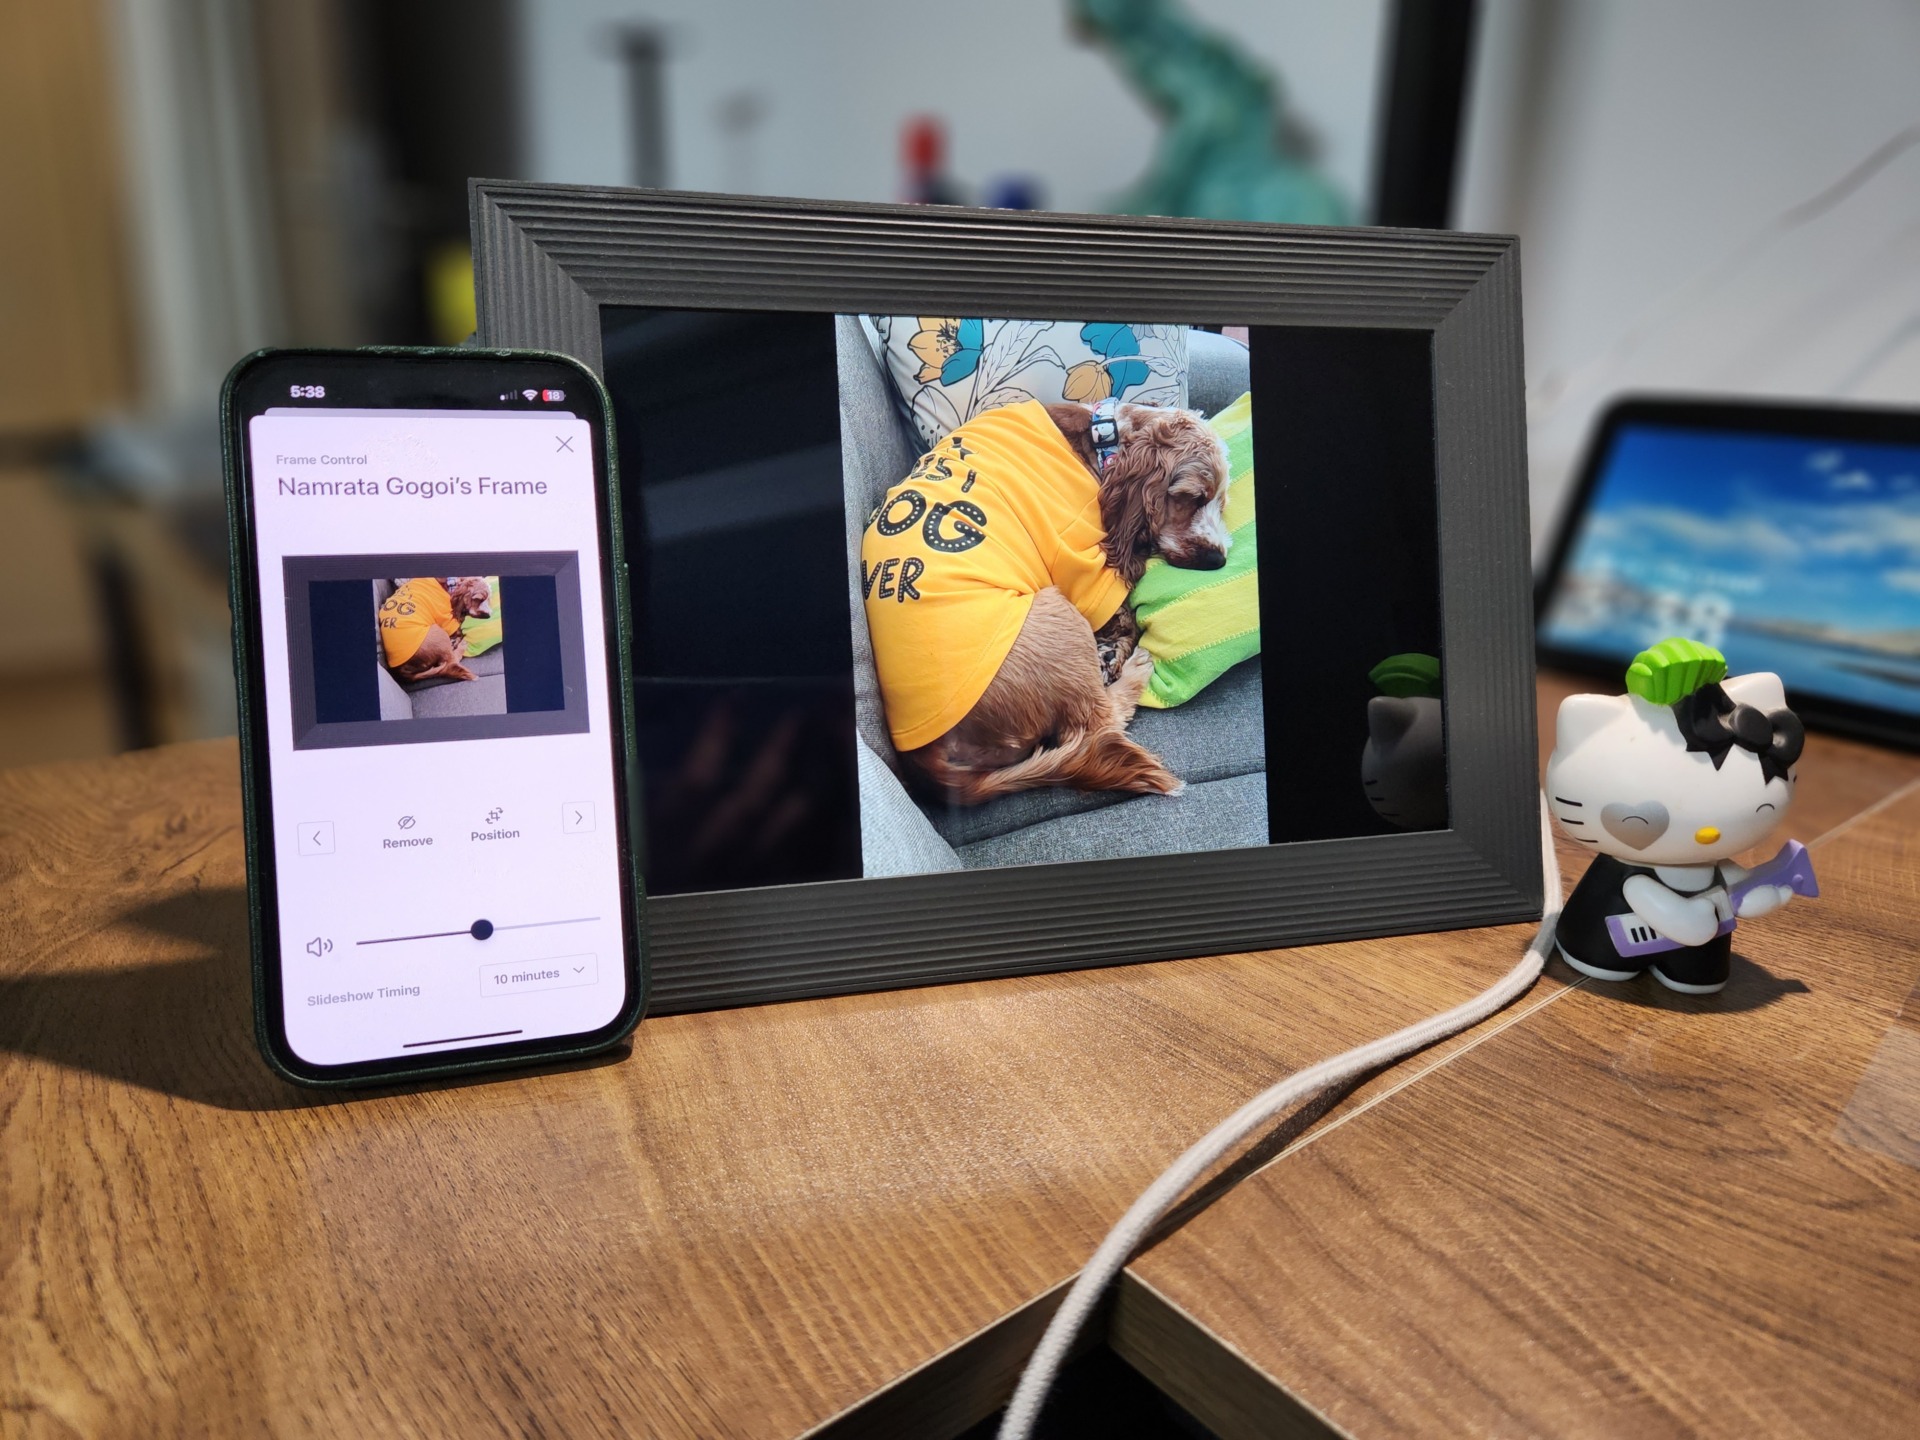
You can slide your finger on the touch bar at the top to cycle through the different photos.
How to Set Up the Aura Carver Digital Photo Frame For Guest
Setting up the guest account in the Aura Carver is almost similar to creating your own account. The best part is that the app walks you through most of the steps. Step 1: Open the Aura Frame app and create an account. Like the one above, you will need to enter your name, email ID, and an optional profile picture.
The profile picture helps you distinguish between other members. You can share Aura Carver frame between family members. Tap Next. Step 2: Pick ‘Someone else’ from the list of options.
Next come the connection options. In our case, we went ahead with the ‘Plug in the frame’ option since we wanted a proper setup before gifting it. Step 3: Connect the frame to a power source. It will take a couple of minutes to load. Once done, it will display a 4-digit number. On your phone, tap on OK for the Bluetooth prompt. Bluetooth enables the Aura Carver digital frame to connect to your phone.
Step 4: Enter the four-digit code on your phone as shown below and hit the Connect button.
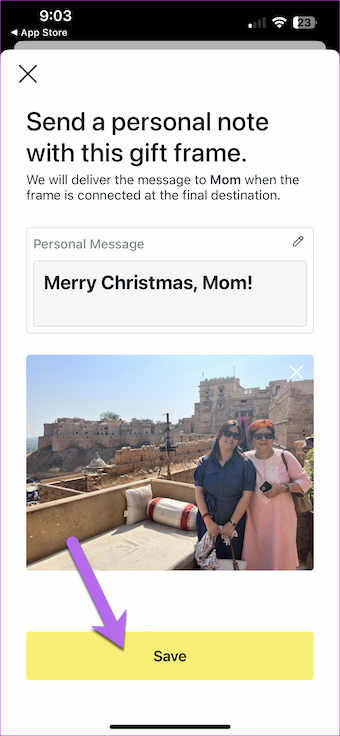
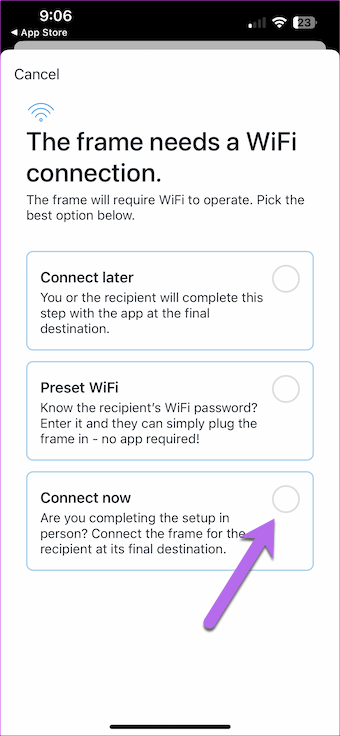
After the connection establishes, you can name the frame. The good thing is that the recipient can always rename it later. Following that, you can add a message, add other family members, add welcome photos, or have a temporary Wi-Fi connection. Step 5: Click on Gift message & Photo to add a message and a photo, and save the settings. Note that you can’t see the photo on the frame until you connect it to Wi-Fi. After this, the Aura Frame app gives you several connectivity options to pick from. And depending on the situation at hand, you can take the required steps. For example, if you want to see how the photo looks in the frame, you can connect temporarily to your home Wi-Fi.
Or, you can enter the Wi-Fi password if you know it. Now, all you have to do is pack up the digital frame and ship it. When the recipient connects the frame to power and Wi-Fi, they will see the message and the photo.
How to Turn Off Photo Match Settings in Aura Carver
The Aura Carver has a built-in algorithm that helps display the right photo in the right frame. For example, if you have two similar vertical photos, Carver will group them into a single frame. Secondly, it can also remove duplicates from the mix, even though you upload them by mistake. The Smart Suggestions feature is enabled by default. But you may choose to disable it. This option is available right after you set up the digital frame. However, if you want to get back to it later, you can find it under Settings. To access it, tap on the Cog-icon in the top-right corner of the Aura Frame app. Next, tap on Photo match and disable it.
How to Change the Slideshow Timing in Aura Carver
Yes, you can also play with the slideshow timing. By default, the frame displays each photo for 10 minutes. Thankfully, you can change it through the settings. To do so, head over to Settings and hit the Timing option. Select from the long list of available options. Yes, you can thank me later!
Smile!
So this is how you could set up the Aura Carver digital frame. The steps are easy to follow, and the set-up barely takes more than 5 minutes. If you want to reset the digital frame, you can find the Reset hole at the bottom of the frame. Press and hold a small paper clip until you see the ‘Factory reset’ message on the screen. The above article may contain affiliate links which help support Guiding Tech. However, it does not affect our editorial integrity. The content remains unbiased and authentic.